How to take better railway photographs – Pip Dunn explains
Do you ever look at a picture in a magazine and think: “I wish I could take an image that good”?
Here are a few basic tips on equipment, technique and approach to help you get that bit better at railway photography.
Photography has come on leaps and bounds in the last 20 years, with the move to digital cameras and now smartphones.
From the history of steam through to 21st century rail transport news, we have titles that cater for all rail enthusiasts. Covering diesels, modelling, steam and modern railways, check out our range of magazines and fantastic subscription offers.
For a start, it’s much cheaper. There is no film to buy, no film to develop, no waiting to finish a film before getting it processed, and no more taking one shot and hoping it works out all right.
I used to do a job and rattle off a 36-exposure film. Now I can play around with settings and come home from an event with at least 300 pictures. Admittedly, not all of them are usable, and several will often be ten pictures of the same subject from slightly different angles.
At Railways Illustrated we receive some excellent pictures, submitted by brilliant photographers who know how to take a shot and how to tweak it slightly to bring the picture to its full potential. They can address any small error they may have made in their exposure settings, crop slightly to perfect the composition, or even Photoshop out minor imperfections.
This article is aimed at giving you a little guidance and inspiration on some of the ways to take better shots.
Equipment
I think it must have been about 20 years ago when I got my first digital SLR camera. I’d had a couple of point-and-shoot compact cameras, which at the time I thought were brilliant because they were so portable, but for shots of moving subjects of decent quality, such as trains, I still needed a camera where I could fully control the settings and change lenses. This meant an SLR — single lens reflex — camera.
I’ve updated my SLR a couple of times in those two decades and now use a Canon 6D Mk2, which I must have had for at least eight years. I’m not sure why I’ve always chosen Canon. Maybe it was on the advice of trusted photographers; maybe I’m just used to the way they handle. There are many other quality options, such as Nikon, Sony, Olympus and Pentax.
I don’t have too many lenses. I have a 24-105mm lens for general use and a 16-35mm wide-angle zoom for close-ups and interiors. I also have a 75-300mm telephoto lens, but I rarely use it.
In recent years, mirrorless cameras have become very popular as an alternative to an SLR. These use an electronic rather than optical viewfinder, so there is no need for a reflex mirror. This generally makes for a smaller and lighter camera, but still with very high-quality results.
I don’t take my SLR out all that often these days, except when I know I’ll really need it. For a visit to a gala, I’ll often just use my iPhone. It’s not that long ago that using a phone for railway photography was sometimes sniffed at, but that is no longer the case. The latest smartphones are great for pictures, and the image files are of a size that is certainly publishable quality.
You can even shoot RAW on them — more on that in a bit — and you can shoot video as well. The latest versions also allow you to shoot stills while videoing, which is a function I really like, although I do find the quality of those stills is not as good as that of an iPhone still image in its own right.
File format
On most digital cameras you can shoot in RAW or JPEG, or both.
RAW files store all data from the camera sensor, capturing more detail in the highlights and shadows, and offer greater editing flexibility. For example, you can make post-shoot tweaks to exposure and white balance. The downside is that files are much bigger — typically 30MB-plus — so they take up a lot more space on your hard drive.
JPEGs are compressed files and have some element of in-camera processing, which discards some data, reducing detail in return for smaller file sizes.
In short, it is widely accepted that shooting RAW is best for high quality and better editing, while JPEGs are fine if you don’t intend to edit the picture afterwards and want to use the image quickly, for example on social media. JPEGs are more widely used by those who like to take pictures but are not edging towards professional use of their images. Having said that, carefully taken JPEGs can often still be perfectly usable for magazines.
I admit I shot JPEGs for ages, but recently I have exploited the feature that most cameras have: the ability to shoot both. It saves a JPEG and a RAW image of every shot you take.
This does demand a lot of storage on your computer. I suggest buying a plug-in external hard drive backup with a capacity of at least 1 Terabyte, for a couple of reasons. Firstly, it has the room to store masses of big photo files, but it is also a handy backup if your computer hard drive fails.
Poles
A fairly recent development in the last 15 years or so has been pole photography, brought about by the availability of affordable ways to control a camera remotely, such as with a tablet and WiFi.
I see a lot of people moaning about pictures taken with poles, which in my opinion is ludicrous. A pole is just a useful new tool available to the modern-day photographer, in the same way that colour film revolutionised photography and digital photography revolutionised it further. I dare say in the early noughties, some diehards were belittling digital cameras.
I don’t have a pole myself and I’ve never used one, but there has been the odd occasion where I wish I had one. As an editor looking for good images, I don’t have a problem with pole pictures and very often, unless you know the photo location well, you wouldn’t even know this method had been used.
Poles can open up locations where you cannot get decent shots any other way. With excessive lineside vegetation often a big problem for photographers these days, in some cases a pole is the only way to get a shot.
Pole photography requires a lot of practice, as when you are controlling a camera at height remotely, many different errors can and will occur. Poles are therefore better suited to pictures that have been carefully planned, rather than “on the hoof” instant photos you take when you suddenly see something you want to shoot.
Drones
Drones can be more controversial and there are legal implications with using them, which you must fully understand before you use them. For example, they are subject to restrictions on height and are banned completely in some areas of airspace.
They can also be intrusive. You wouldn’t want a drone taking a photo of your family in your garden, and in a similar way you do have to respect the privacy of private companies at their depots and the like.
For some uses, such as the picture we ran a few issues ago of a train passing along the Dawlish sea wall taken by a drone, they are excellent. Again, they offer an angle that would have been impossible before, unless you had access to a helicopter. Drone shots of the Greatest Gathering were fascinating, as they showed the enormity of the site and the exhibits.
A photo taken using a drone can show an impressive vista, but as most drones use wide-angle lenses, it can be easy to end up with the train looking very distorted.
I am not anti-drone when it comes to pictures. Again, they are just a modern tool available to the photographer, but I do prefer, in most instances, images taken a little closer to the ground.
Editing
What level of editing, or processing, you do on a picture is down to the individual’s taste, skill and available time. It also depends on the quality of the image to start with and what format was used.
Photos taken in RAW format are simply not intended to be the finished article “straight out of the camera” and will need tweaks to contrast, colour and so on with software such as Photoshop or Lightroom. With these tools you can also make many more adjustments to refine an image, for example to make sure it is level, and to a certain extent you can change the composition by selective cropping of the image.
These tools can sometimes be used to revive a poorly taken image, for example if you got the exposure wrong when you took the shot, especially if you were shooting in RAW.
They also allow you to remove things from the image, and here you need to be careful. You might want to edit out cars, people, clutter or whatever if you feel they are in the way and detract from the main subject. However, in my opinion this is best kept to a minimum, especially if you are submitting a photo for possible use in a book or magazine.
Many years ago, naively in hindsight, I ran what I thought was a superb picture where the photographer got possibly the greatest bit of luck imaginable: a shot of a Class 67 heading south at Abbotswood Junction, with another 67 heading towards Worcester on the line from Evesham.
It wasn’t until it came out in the magazine that I got a call to say it was two pictures “stitched” together and the 67 on the overbridge had actually appeared a few minutes later than the one on the Bristol line. If I had known this, I wouldn’t have used the photo because it is effectively distorting history.
However, in my time in publishing I have occasionally used images which have received more minor manipulation, for example removing excessive “bellowing” that might have been incriminating for the person in the photo.
It is important to point out that the practice of enhancing or doctoring a photo is nothing new. In film days it was possible, although tricky, to make small alterations to an image in the darkroom, such as removing a telegraph pole growing out of a steam locomotive’s chimney.
So what kit do I actually need?
Like most things in life, to get the best pictures it helps to invest in some decent kit and learn how to use it. But I will also say that you don’t need to buy the most expensive products by any stretch of the imagination.
You don’t need a Hasselblad or Leica camera; any well-known brand will do fine. But likewise, some cheap knock-off copy bought off a market stall in Istanbul might not give you the longevity you need.
You need to do your research. Talk to others and listen to their experiences with their kit. What kind of images do you actually want? What features on the camera will you actually use? There is plenty of advice online. Read it, read some more, and then make a balanced decision based on your budget and requirements.
Getting that shot
For most people, just turning up at the lineside and shooting whatever goes past is perhaps less common these days, simply due to there being fewer interesting trains, unless you are a fan of multiple units.
There is no denying the fact that the railway has far less variety than it had years ago in terms of traction, but on the other hand, the availability of information is far superior to days gone by. Not only is it easier to find out what unusual or photogenic trains are running, and where, but now we have real-time information from the likes of Real Time Trains, Open Time Trains, Traksy, Railcam and other online resources which give you a pretty good idea where a train is.
I remember I struggled to photograph freight trains in the 1990s because the only resource available was the Freightmaster book. You could go out to see a timetabled freight train only to find out it had run early, or it had been cancelled, or might be hours late. Real Time Trains eliminates that jeopardy.
To start building a varied portfolio of railway pictures, nothing beats having an extensive knowledge of locations. This only comes with time and effort. Obviously you can look at where other photographers have taken successful photos and use that as a starting point.
But a lot of satisfaction can come from exploring the lineside and finding locations yourself, so get your walking boots and OS map out. These days you can even recce some locations from the comfort of your home using online aerial or street-view mapping.
It also helps to have an understanding of sun angles. Online resources such as The Photographer’s Ephemeris and SunCalc are invaluable. Everyone will have their favourite locations for a photo; however, for conventionally lit shots with “sun over your shoulder”, most spots are only at their best at certain times of the day due to the position of the sun.
But remember, rules are there to be broken. For example, a really nice glint or silhouette shot can have great impact. If the weather is cloudy, consider taking the opportunity for an angle which would normally be on the shadowy side of the train if the sun was out.
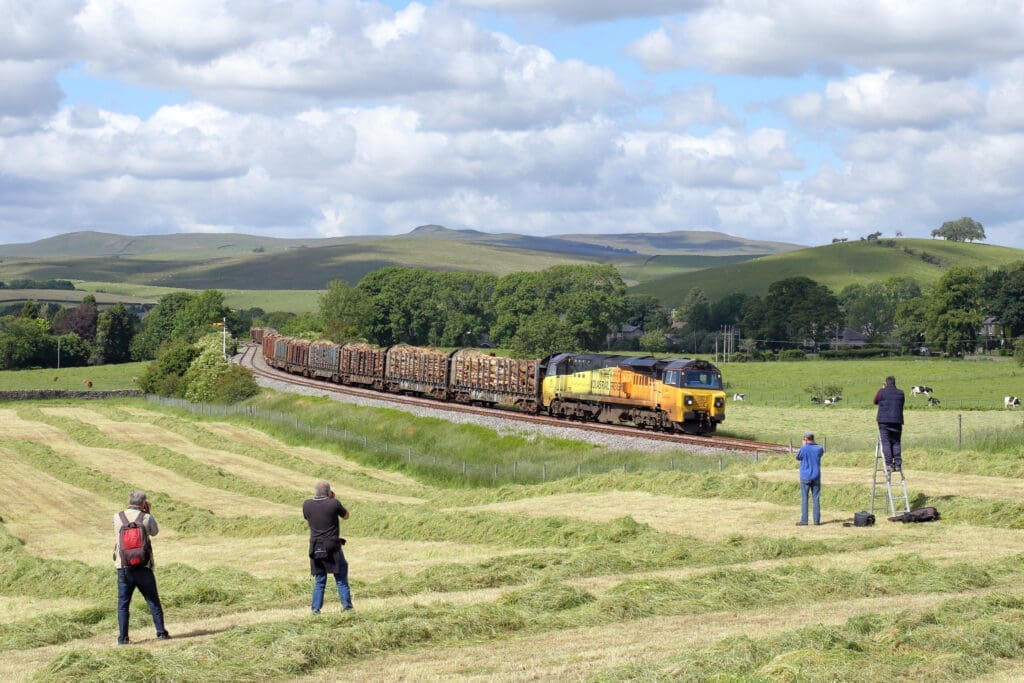
Look at the clutter around you. Is it going to get in the way, or is it distracting? Do you really want a pylon sticking out of the train?
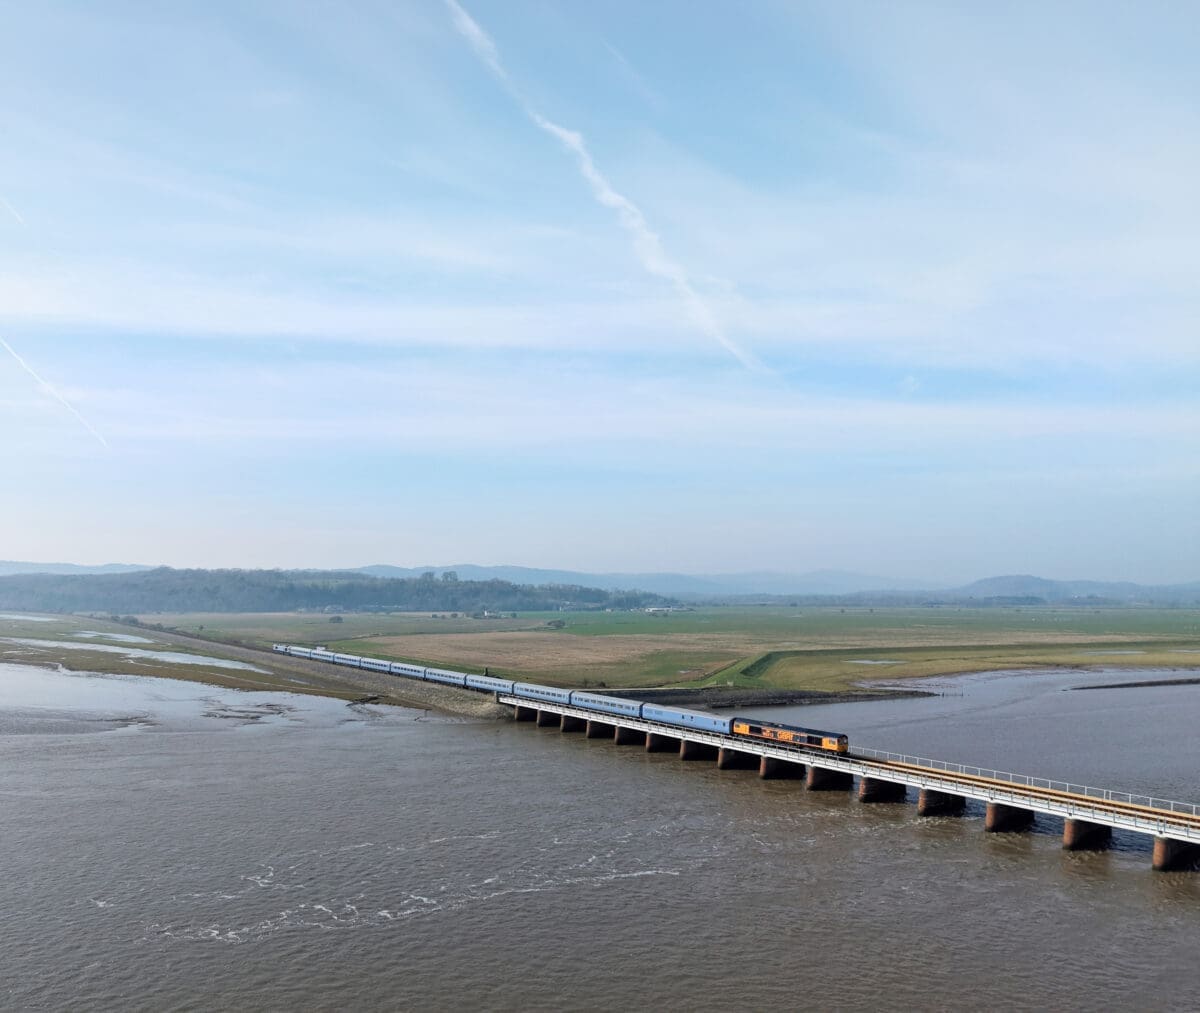
Interesting infrastructure can make a successful picture. There are far fewer signalboxes and semaphore signals around these days, but the railway has many fantastic bridges, and some stations are real gems.
One mistake I often see is photos “composed” very tight on the train itself, with little or no surrounding scenery to place the picture. If you can, take a few steps back and show the whole scene. Put another way, try a composition where the train is a bit smaller in the shot. You can always crop the photo a little bit afterwards if you don’t like the result.
Good photography is a skill. You can’t just pick up a decent camera and expect to get a great shot straight away. You need to learn those skills — I’m still working at it — but stick at it, persevere and you’ll get there.
In many ways, it is a darned sight easier to get good results now with extremely capable and flexible digital cameras, where you can see your results instantly, without the constraints of yesteryear.
Happy photting!